How Caustica works

Caustica is a tool for easily visualizing strong gravitational lensing, named after the term used by 17th century mathematicians for the curves onto which refracted light rays converge, which were capable of burning objects.
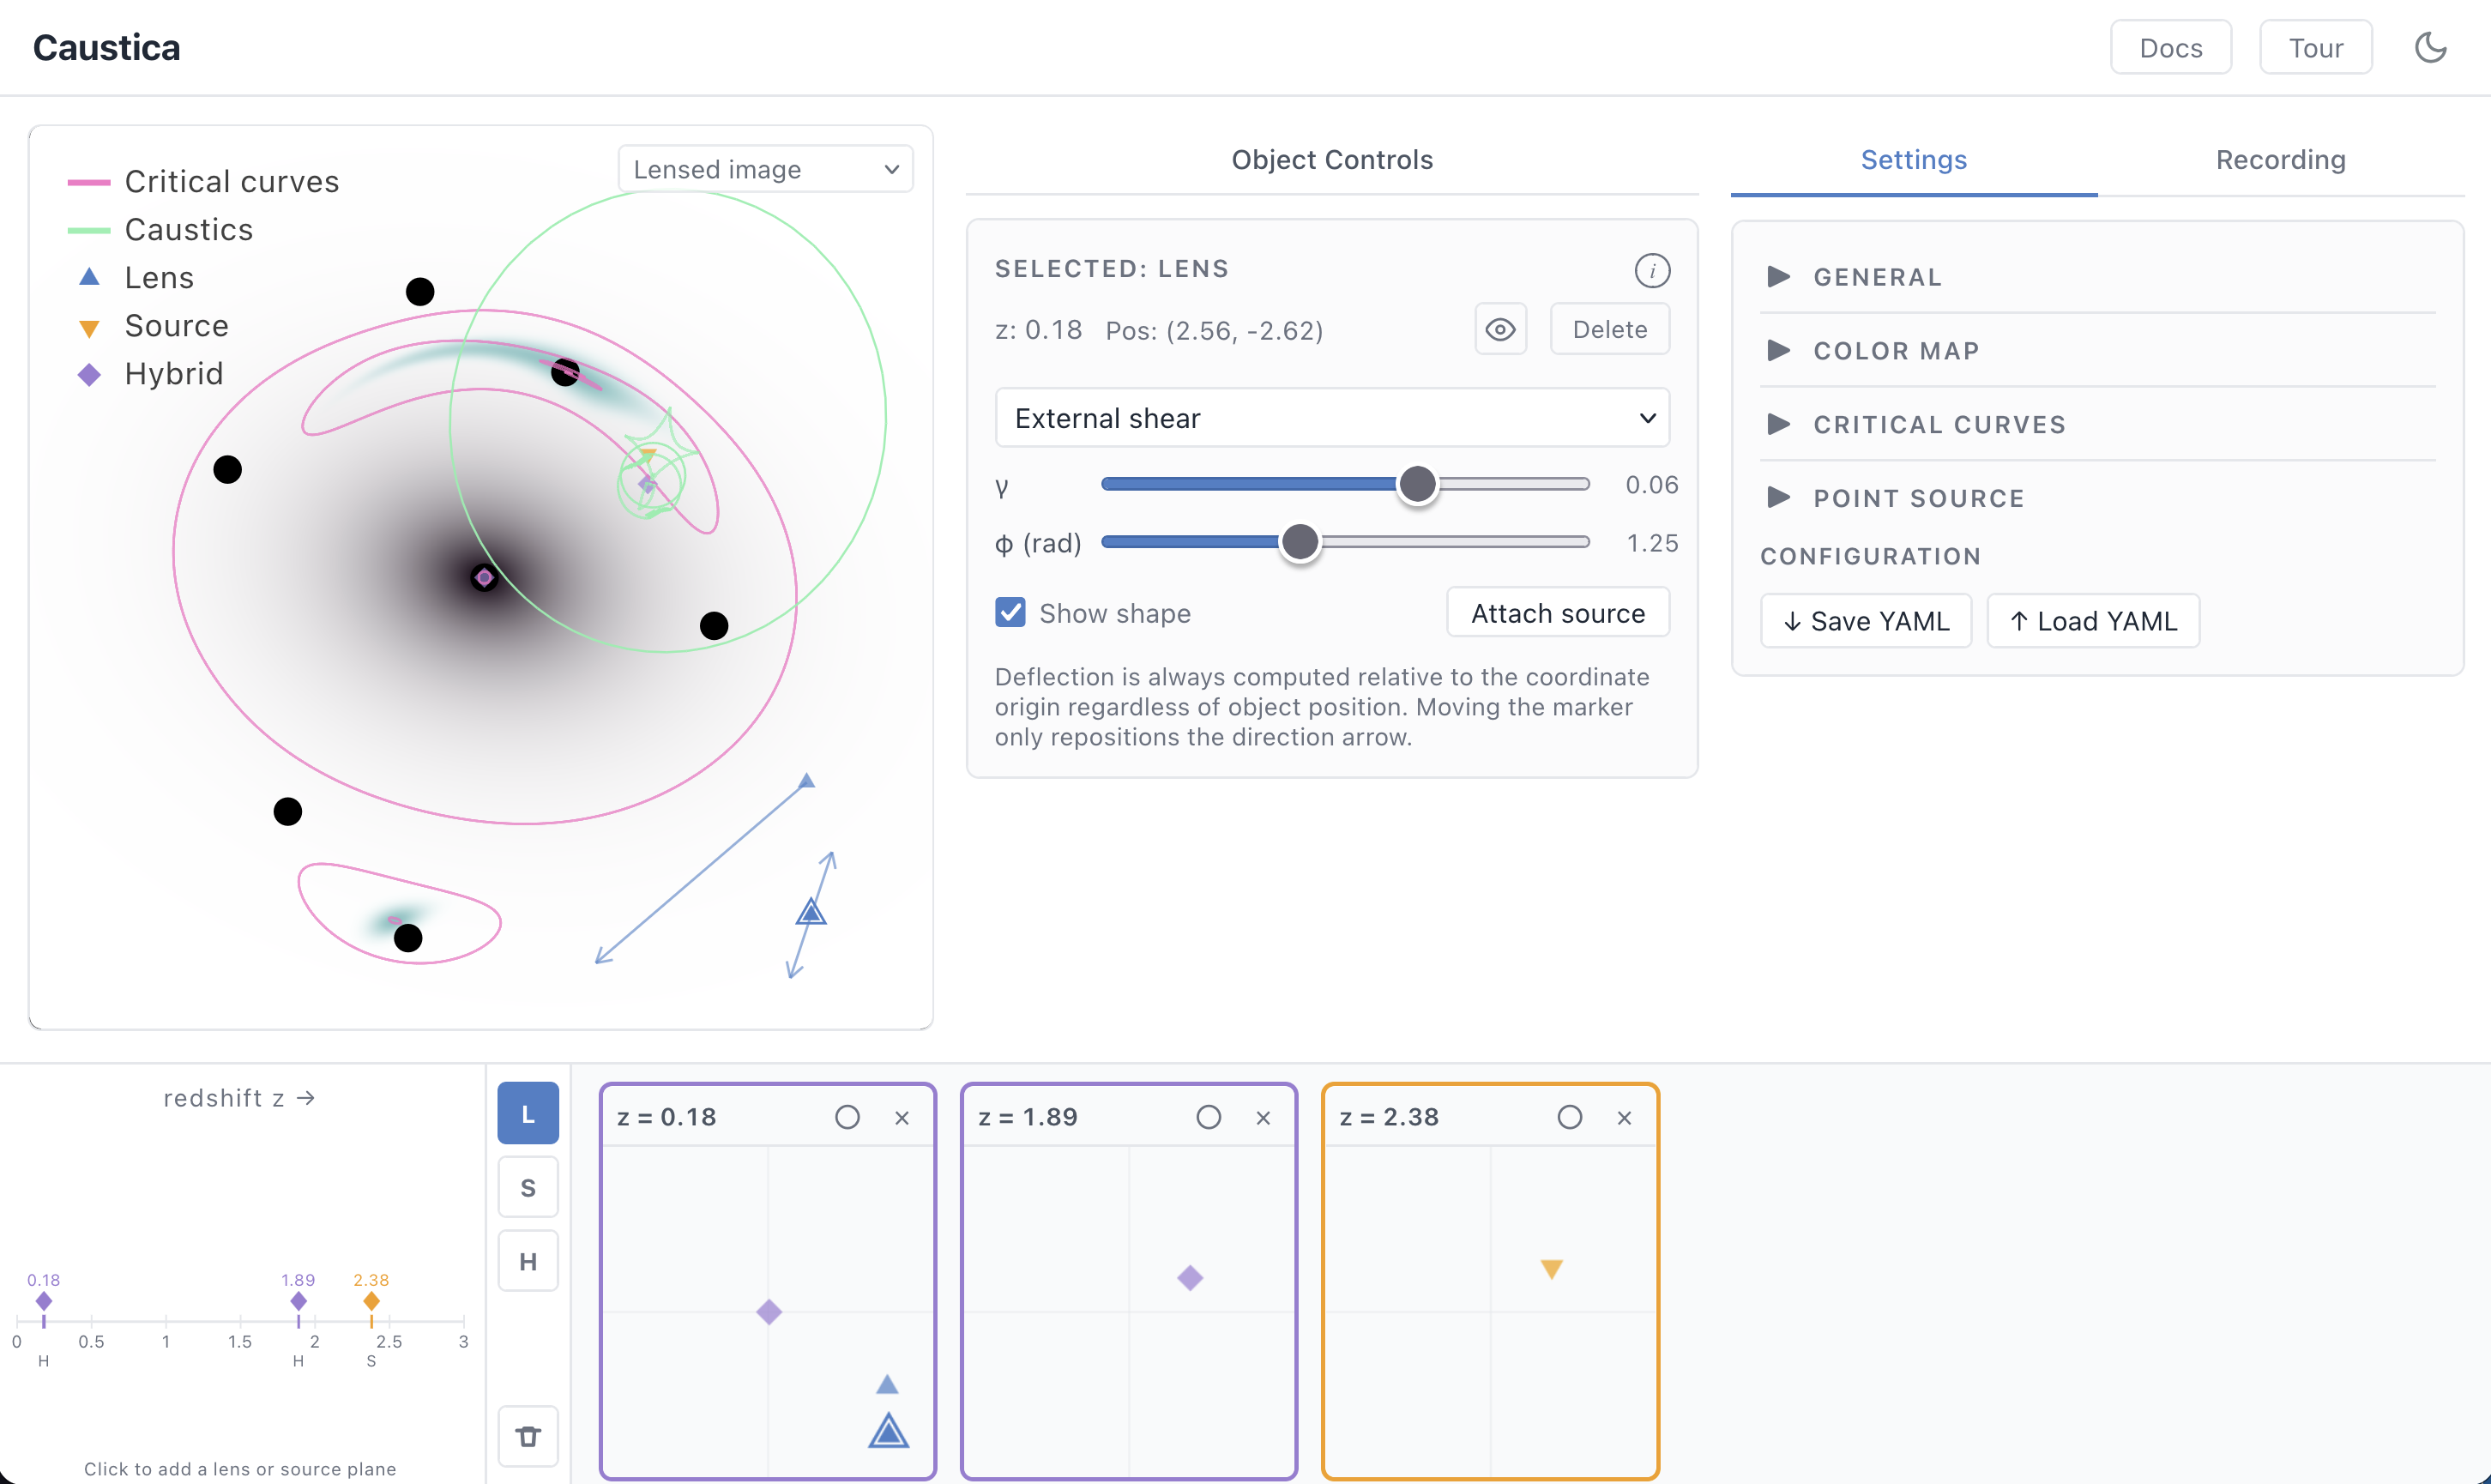
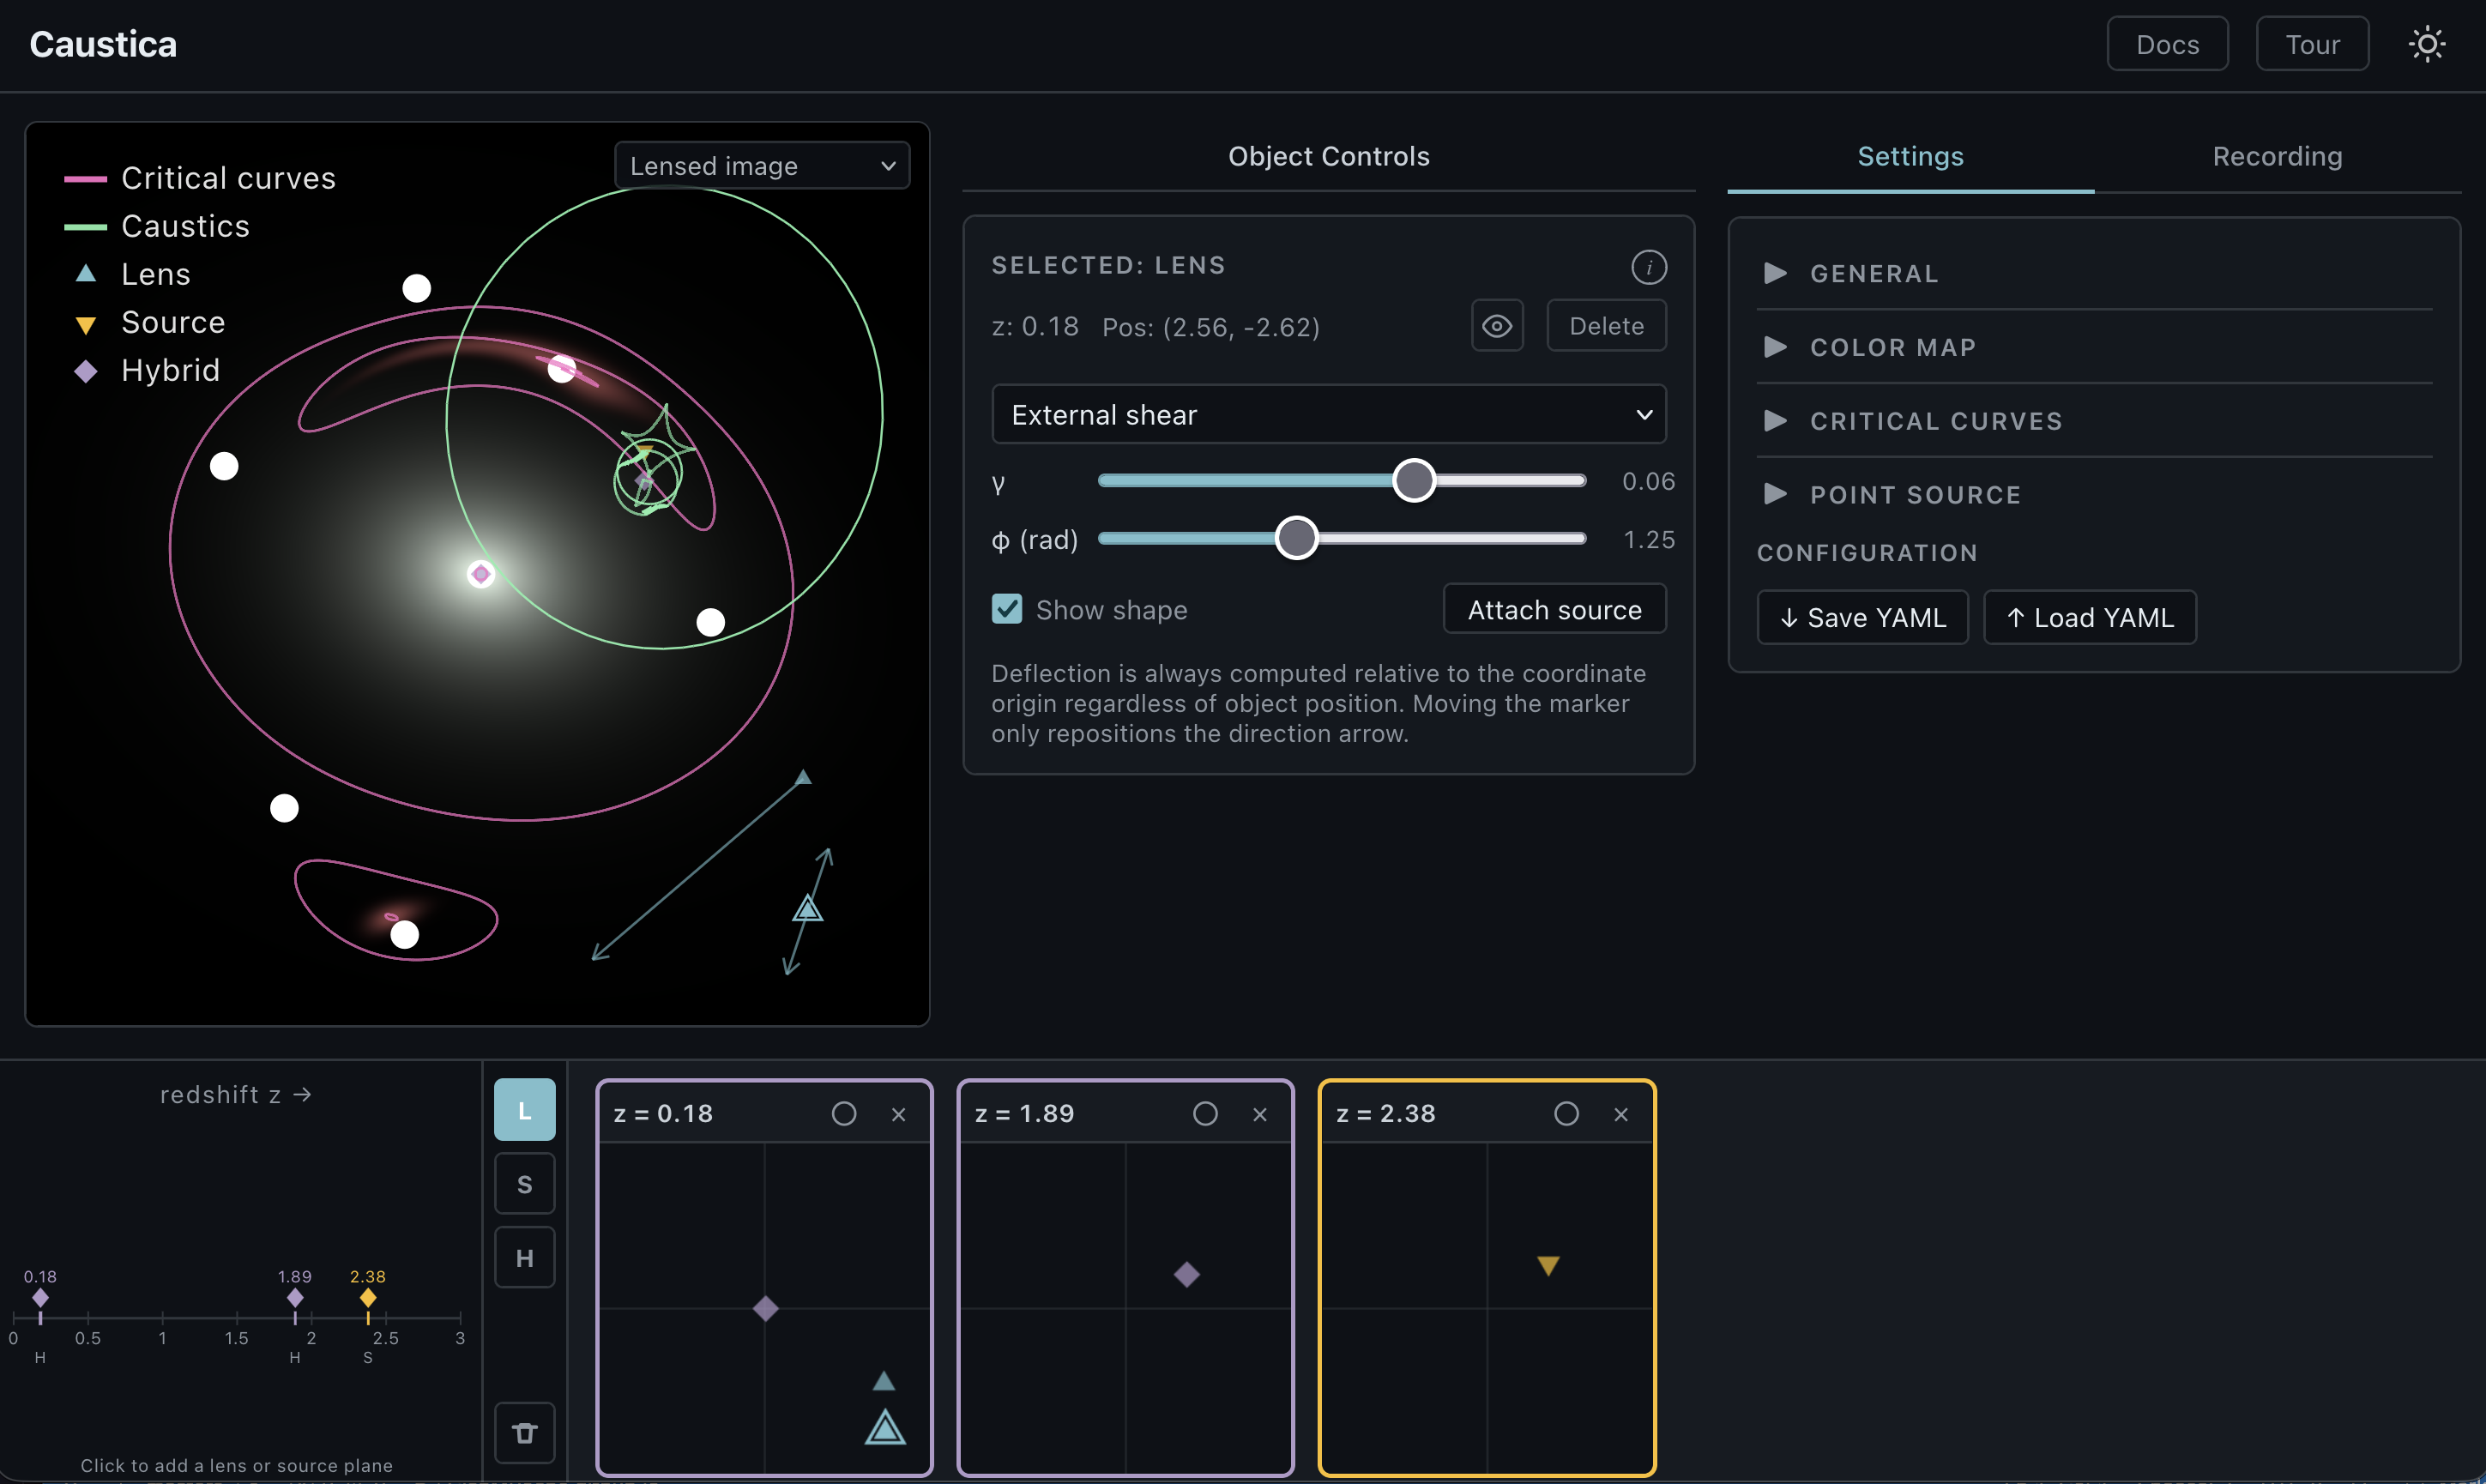
The Caustica interface: lensed-image panel, redshift timeline, and control tabs. The Caustica interface: lensed-image panel, redshift timeline, and control tabs.
The Caustica interface recreating a zigzag lens configuration. The image panel shows the lensed view; the redshift timeline below it and the Scene tab on the right hold the lens and source objects.

Caustica was built with heavy use of AI tools for code generation, and as a whole its calculations have not been peer-reviewed or independently validated. Where a component was cross-checked against an established reference it is noted in the relevant section (for example, the EPL lens was ported from and validated against lenstronomy; see §5). It is intended for education, intuition-building, visualization and media creation only, and should not be relied on for research.

Quick start

  1. Click the redshift timeline (the axis under the image) to add an empty plane. Plane markers sit on the axis itself (stacking upward only when they would overlap); drag one to reposition it, and click one to select that plane — the selected marker carries a ring and a bold redshift label. The zmax field at the axis’s right end sets its range.
  2. Pick a creation tool in the plane viewer (or press 1 / 2 / 3): Lens (deflects light), Source (emits light), or Hybrid (both at once, shown as a purple dot). There is no separate select tool: click the highlighted tool again (or press Esc) to switch it off, and with no tool active a click or tap only selects and drags, so you can move objects around without risking creating a new one.
  3. Click the plane viewer to place an object of the chosen type in the selected plane at that sky position, then drag to fine-tune, either in the viewer or on the main image (the main image never creates objects, so clicks there are always safe). The viewer shows the selected plane’s true (unlensed) positions: the L / S / H tools and a trash button run down its left side, the ‹ › arrows flank the canvas (a horizontal swipe on touch, when not starting on an object, also steps through the planes), and a Redshift box sits at the top right, with labelled Clear (clear all objects) and Delete (delete plane) buttons under a “Plane:” heading at the bottom right. On desktop the plane viewer is pinned to the bottom of the control rail so it stays visible under every tab, and the tab holding the object parameters is labelled Object. On phones the viewer moves into its own Scene tab alongside the redshift timeline, the object parameters keep a separate Object tab, and the right-side controls compact to keep the plane canvas large.
  4. Adjust parameters in the Scene tab on the right. For hybrid objects, separate collapsible sections appear for the lens and source halves, each with its own show/hide (eye) and delete buttons, so a single half can be toggled or removed while the other stays. The eye button excludes an object from the computation without deleting it. Copy the selected object with Cmd/Ctrl+C and paste a duplicate in the same place with Cmd/Ctrl+V. Scene edits — adding, moving, deleting, and adjusting objects and planes — can be reversed with the undo/redo arrows to the right of the title (or Cmd/Ctrl+Z and Cmd/Ctrl+Shift+Z); view settings such as field of view and colour mapping are not part of the undo history.
  5. The image panel updates in real time. Press C to overlay critical curves and caustics (the chips beside the view dropdown toggle the same overlays). Zoom with the mouse wheel or a two-finger pinch; the scale bar at the bottom right of the image tracks the angular scale as you zoom (1″, 2″, 5″, or 10″ depending on the field of view), and the View tab accepts an exact FOV value. The View tab’s Hide all overlays switch blanks every annotation and the on-canvas controls (view dropdown, overlay chips, ruler buttons) for a clean plot until switched back. Use the Export tab to save a PNG, WebM, or GIF.
  6. Measure angular distances with the ruler. The ruler is off by default: enable it with the Ruler toggle in the View tab, or just press L (which enables and arms it in one step). Its button sits at the bottom-left of the image panel; click it or press L to arm it, then click-and-drag on the image between two points: a line appears with its separation in arcseconds and position angle (e.g. 1.42″ · 34°). Each new measurement becomes the selected item, and measurements are editable: click one to select it, drag its line to move it, or drag an endpoint to reshape it. Delete the selected measurement with its trash button or Backspace; clear all of them with the × button. Measurements persist when you toggle the ruler off. The measurement lines are captured in saved PNGs and recordings; the ruler buttons themselves are not.
  7. Save and load configurations using the Save / Load buttons in the top bar, next to the preset dropdown (on phones they move into the top bar’s overflow menu, which also holds Docs, Tour, the shortcut reference, and the theme toggle, keeping undo / redo and presets on a single row). The file stores all planes, objects, and parameters along with the full view state, so a loaded config reproduces the same picture: field of view, active quantity, per-quantity color mapping, contour spacing, the critical-curve resolution, point-source grid density, and render scale, and the overlay and ruler toggles. Any setting absent from a file loads at its default value.

Keyboard shortcuts

KeyAction
1 / 2 / 3Toggle the plane-viewer tool: Lens / Source / Hybrid (click the viewer to place)
CToggle critical curves and caustics
IShow lensed image (exit any quantity map)
KConvergence κ map
GShear γ map
MMagnification |μ| map
ADeflection |α| map
TFermat potential φ contour map
HHide / show the selected object
OClear all objects from the selected plane
XDelete the selected plane
RStart / stop live recording
LToggle ruler mode (arm / disarm the ruler)
DToggle dark / light theme
?Show the in-app keyboard-shortcut overlay
Cmd/Ctrl + C / VCopy the selected object / paste a duplicate in place
Cmd/Ctrl + Z / Shift+ZUndo / redo the last scene edit
↑ ↓ ← →Nudge selected object (hold for acceleration)
Delete / BackspaceDelete the selected object, or the selected ruler measurement
EscapeDeselect the selected ruler, else disarm the ruler tool, else switch off the active plane-viewer tool, else deselect the object

1. Coordinate system

All angular positions are measured in arcseconds (″): object coordinates $(c_x, c_y)$, deflection angles, and size parameters all use this unit. The image panel shows a square patch of sky of side field of view fov (default 4″), centred on the optical axis. A scale bar at the bottom right of the image shows a round angular length (1″ for fov ≤ 6″, 2″ up to 10″, 5″ up to 30″, 10″ beyond), togglable in the View tab and included in captures. Radians appear only in intermediate formulae and are converted back to arcseconds throughout.

Measuring with the ruler

To read an angular separation directly off the image, enable the ruler (it is off by default) with the Ruler toggle in the View tab, or press L, which enables and arms it in one step; once enabled, the button in the bottom-left corner of the image panel (or L) toggles arming. With the tool armed, click and drag between any two points: the line’s length is reported in arcseconds and its position angle, measured counter-clockwise from the positive $x$-axis (rightward) with $y$ increasing upward, as distance″ · angle°.

Endpoints are stored in sky coordinates, so a measurement stays anchored to the same points (and its readout stays constant) as you change the field of view. Measurements are additive: each drag adds another line, and the newest one becomes selected. A committed measurement is a first-class object: click it to select it, drag its line to move it, or drag either endpoint to reshape it. Only one thing (a measurement or an object) is selected at a time. Delete the selected measurement with the trash button next to the ruler or with Backspace; the × button clears all of them. Measurements persist when you toggle the ruler off (Esc first deselects the current measurement, then disarms the tool). The ruler lines are drawn on the same overlay as the markers and critical curves, so they appear in saved PNGs and recordings; the ruler buttons, being ordinary UI chrome, are excluded from both.

2. Cosmological distances

The simulation uses a spatially flat ΛCDM cosmology. $H_0$ and $\Omega_m$ are adjustable in the Settings tab (the gear icon); the universe is kept flat, so $\Omega_\Lambda = 1 - \Omega_m$. Defaults:

SymbolDefaultMeaning
$H_0$70 km s⁻¹ Mpc⁻¹Hubble constant (adjustable, 50–100)
$\Omega_m$0.3Matter density parameter (adjustable, 0.05–0.6)
$\Omega_\Lambda$$1 - \Omega_m$Dark-energy density parameter (flat universe)
$c$$2.998\times10^5$ km s⁻¹Speed of light

Because the lensed image, the $\kappa/\gamma/\mu$ maps, and the critical curves depend only on ratios of angular-diameter distances, $H_0$ leaves them unchanged and only $\Omega_m$ shifts them. $H_0$ does set the absolute distance scale, so it rescales the physical time delays (§4): the delays scale as $1/H_0$, which is the basis of time-delay cosmography.

Dimensionless Hubble parameter

\[E(z) = \sqrt{\Omega_m(1+z)^3 + \Omega_\Lambda}\]

$E(z)$ encodes how the expansion rate changes with redshift.

Comoving and angular diameter distances

The comoving distance to redshift $z$ is:

\[\chi(z) = D_H \int_0^z \frac{dz'}{E(z')}, \qquad D_H = \frac{c}{H_0} \approx 4283\;\text{Mpc}\]

The angular diameter distances used in the lensing formula are:

\[D(0,z) = \frac{\chi(z)}{1+z} \qquad \text{(observer to redshift } z\text{)}\] \[D(z_1, z_2) = \frac{\chi(z_2) - \chi(z_1)}{1+z_2} \qquad \text{(between two redshifts, flat universe)}\]

Numerical integration

$\chi(z)$ has no closed form and is evaluated with the midpoint Riemann rule at $n = 200$ steps:

\[\chi(z) \;\approx\; D_H \cdot \Delta z \cdot \sum_{i=0}^{n-1} \frac{1}{E\left(\bigl(i+\tfrac{1}{2}\bigr)\Delta z\right)}, \qquad \Delta z = \frac{z}{n}\]

For $n = 200$ and $z \leq 5$ the relative error in $\chi$ is below $0.01\%$, negligible for lensing purposes.

Distances are precomputed once whenever the plane configuration changes and packed into two arrays passed to the GPU:

ArrayEntryMeaning
D_obs[i]$D(0, z_i)$Observer to plane $i$
D_btwn[i,j]$D(z_i, z_j)$Between planes $i$ and $j$

3. Multiplane lensing recursion

Planes are sorted by increasing redshift. A ray observed at image-plane angle $\boldsymbol{\theta}$ (a 2-D vector in arcsec) is traced forward through each plane in order. Its angular position at plane $j$ is given by the multiplane recursion (Schneider, Ehlers & Falco 1992):

Multiplane recursion

\(\boldsymbol{\theta}_j \;=\; \boldsymbol{\theta} \;-\; \sum_{k\,<\,j} \frac{D_{kj}}{D_j}\;\hat{\boldsymbol{\alpha}}_k\left(\boldsymbol{\theta}_k\right)\)

SymbolMeaning
$\boldsymbol{\theta}$Observed angle (image-plane position); fixed for each rendered pixel
$\boldsymbol{\theta}_j$Ray’s angular position at plane $j$ (arcsec)
$D_{kj}$Angular diameter distance from plane $k$ to plane $j$
$D_j$Angular diameter distance from observer to plane $j$
$\hat{\boldsymbol{\alpha}}_k(\boldsymbol{\theta}_k)$Deflection angle from all lens objects in plane $k$, evaluated at the ray’s position $\boldsymbol{\theta}_k$

Each object carries its own type, lens or source, independently of which plane it belongs to. Only lens objects enter the deflection sum; source objects are passive and receive the ray without contributing to it. A plane containing both types is a hybrid plane; its lens objects deflect and its source objects emit, handled separately by the same recursion. The weight $D_{kj}/D_j$ converts the deflection at plane $k$ into its angular displacement at the later plane $j$.

The position at the target plane is the source-plane position $\boldsymbol{\beta}$, where source brightness is sampled.

Key idea. Because each lens plane evaluates its deflection at the ray’s already-deflected position $\boldsymbol{\theta}_k$, successive lens planes interact non-linearly, a key feature of multiplane lensing absent in single-plane calculations.

Two lens planes at different redshifts bending light from a background source into arcs. Two lens planes at different redshifts bending light from a background source into arcs.
A two-lens-plane configuration: lenses at z = 0.4 and z = 0.8 deflect light from a source at z = 1.6, the two deflections compounding non-linearly.
Redshift timeline showing two lens planes and a source plane as draggable markers. Redshift timeline showing two lens planes and a source plane as draggable markers.
The plane controls for the same scene: each plane is a marker on the redshift timeline (observer at z = 0), draggable to set its redshift. Objects are added to the selected plane.

4. Lensing quantities

The lensing-quantities view (dropdown in the top-right of the image panel) visualises several quantities derived from the lens mapping at the chosen source redshift $z_s$.

The lens mapping Jacobian

For each image-plane position $\boldsymbol{\theta}$, the multiplane recursion maps it to a source-plane position $\boldsymbol{\beta}(\boldsymbol{\theta})$. The $2\times2$ Jacobian matrix of this mapping is:

\[A_{ij} = \frac{\partial\beta_i}{\partial\theta_j}\]

Caustica approximates each element using central finite differences with step $h = 0.004\times\text{fov}$:

\[A_{11} \approx \frac{\beta_x(\boldsymbol{\theta}+h\hat{e}_x) - \beta_x(\boldsymbol{\theta}-h\hat{e}_x)}{2h}, \quad \text{etc.}\]

Four Jacobian-derived quantities are available:

QuantityFormulaNotes
Convergence $\kappa$$1 - \tfrac{1}{2}(A_{11}+A_{22})$Dimensionless projected mass density scaled by the critical surface density. $\kappa=0$ in empty space; the mean convergence enclosed within the Einstein radius is $\bar\kappa=1$ (the local $\kappa$ on the ring is smaller, e.g. $0.5$ for an SIS and $0$ for a point mass).
Shear $\gamma$$\sqrt{\gamma_1^2+\gamma_2^2}$, where $\gamma_1=\tfrac{1}{2}(A_{22}-A_{11})$, $\gamma_2=-\tfrac{1}{2}(A_{12}+A_{21})$Tidal distortion; zero for a circularly symmetric lens at its centre.
Magnification $\mu$$1/\lvert\det A\rvert$Ratio of image to source solid angle; diverges on critical curves. Log colour scale over $\mu \in [1, 30]$ by default (adjustable).
Deflection $\lvert\hat{\boldsymbol{\alpha}}\rvert$$\lvert\boldsymbol{\theta} - \boldsymbol{\beta}(\boldsymbol{\theta})\rvert$Total accumulated deflection angle in arcseconds from observer to source plane. Linear colour scale over $[0, 2]$″ by default (adjustable).
Convergence map of a compound lens. Convergence map of a compound lens.
Convergence κ
Shear map of a compound lens. Shear map of a compound lens.
Shear γ
Magnification map of a compound lens. Magnification map of a compound lens.
Magnification |μ|
Convergence, shear, and magnification maps for the same compound lens (a main galaxy with an an off-centre companion), at source redshift zs=1.5.

Distance weighting and the effective shear

In the multiplane recursion, a lens at plane $k$ contributes to $A$ with weight $D_{kj}/D_j$, where $j$ indexes the source plane. As a result, the effective shear and convergence seen in the map are attenuated relative to the model parameter:

\[\gamma_\text{eff} = \gamma_\text{input} \cdot \frac{D_{ls}}{D_s}, \qquad \kappa_\text{eff} = \kappa_\text{input} \cdot \frac{D_{ls}}{D_s}\]

For example, an external shear with $\gamma_\text{input} = 0.5$ placed at $z_l = 0.5$ with $z_s = 1.0$ will show $\gamma_\text{eff} \approx 0.21$ in the map, because $D_{ls}/D_s \approx 0.42$ for those redshifts. The map value equals the input value only in the limiting case $z_l \to 0$, where $D_{ls}/D_s \to 1$.

This is the physically correct behaviour: the same lens produces weaker effective lensing when placed closer to the observer relative to the source.

Numerical accuracy near singular profiles

The finite-difference Jacobian is accurate everywhere except very close to singular or steep profiles (point mass, EPL with large $\gamma’$), where the deflection angle varies as $\sim 1/r$ or faster. Near such singularities the truncation error of the central-difference scheme can produce small spurious structure in the $\kappa$ map; convergence is clamped to zero in the display to suppress the most prominent artefacts. The shear and magnification maps are less affected.

Colour scale, limits, and palette

The $\kappa$, $\gamma$, $\lvert\mu\rvert$, and $\lvert\hat{\boldsymbol{\alpha}}\rvert$ maps share a set of controls in the Color Map section of the View tab. Each map remembers its own settings. The reference source redshift these maps use is set by the zs ref control in the View tab’s Display section (Auto tracks the highest source plane; a chip on the image shows the value in use), and quick toggles for critical curves, caustics, markers, and the colorbar sit beside the view dropdown on the image itself.

A raw quantity value $v$ is mapped to a colour in two steps: first warped to a normalised position $t \in [0,1]$ between the chosen limits, then passed through the selected colour palette.

ScaleMappingNotes
Linear$t = \dfrac{v - \text{min}}{\text{max}-\text{min}}$Proportional.
Square root$t = \sqrt{u}$Expands low values.
Log$t = \dfrac{\ln v - \ln\text{min}}{\ln\text{max} - \ln\text{min}}$True logarithmic axis; needs $\text{min} > 0$. Default for $\lvert\mu\rvert$.
Power law$t = u^{\gamma}$, $\gamma \in [0.1, 2]$$\gamma < 1$ brightens low values; $\gamma > 1$ emphasises high values.
Asinh$t = \operatorname{asinh}(a\,u)/\operatorname{asinh}(a)$, $a \in [0.5, 20]$Linear near the bottom, logarithmic at the top.

(where $u = (v-\text{min})/(\text{max}-\text{min})$ clamped to $[0,1]$).

A small ⓘ button in the section header summarises whichever controls are currently shown. The same Min/Max/Scale machinery also drives the brightness stretch of the lensed-image view (§6).

Magnification map with the Default palette. Magnification map with the Default palette.
Default
Magnification map with the Viridis palette. Magnification map with the Viridis palette.
Viridis
Magnification map with the Turbo palette. Magnification map with the Turbo palette.
Turbo
The same compound-lens |μ| map under three palettes, log scale over the same limits.

Fermat potential

The Fermat potential (also called the arrival-time surface) maps each image-plane position $\boldsymbol{\theta}$ to the light-travel time relative to an undeflected path, for a source at a fixed position $\boldsymbol{\beta}_s$ in the source plane. Caustica builds the full multiplane arrival-time surface in comoving transverse coordinates $\boldsymbol{\eta}_j = \chi_j\,\boldsymbol{\theta}_j$, where $\chi_j$ is the comoving distance to plane $j$ and $\boldsymbol{\theta}_j$ is the ray’s angular position there. The surface sums geometric path-length terms over a reduced sequence of nodes (the observer, each lens plane, and the source) minus the lensing potentials:

Fermat (arrival-time) surface

\(\varphi(\boldsymbol{\theta};\boldsymbol{\beta}_s) = \frac{1}{K}\left[\;\sum_{\text{segments}} \frac{1}{2}\,\frac{\lvert\boldsymbol{\eta}_{j+1} - \boldsymbol{\eta}_j\rvert^2}{\chi_{j+1} - \chi_j} \;-\; \sum_{\text{lens planes } k} \chi_k\,\psi_k(\boldsymbol{\theta}_k)\;\right]\)

The node sequence runs observer $(\chi=0,\,\boldsymbol{\eta}=\mathbf{0}) \to$ each lens plane $(\chi_k,\,\boldsymbol{\eta}_k) \to$ source $(\chi_s,\,\boldsymbol{\eta}_s = \chi_s\boldsymbol{\beta}_s)$, with the final node pinned to the fixed source position $\boldsymbol{\beta}_s$ rather than the traced one. The normalisation $K = \chi_L\,\chi_s/(\chi_s - \chi_L)$, with $\chi_L$ the comoving distance to the first lens plane, rescales the surface so that the single-plane case reduces exactly to the textbook $\tfrac{1}{2}\lvert\boldsymbol{\theta}-\boldsymbol{\beta}_s\rvert^2 - \psi$ and the contour field stays of order unity. $\psi_k$ is the analytic lensing potential of plane $k$ (table below), evaluated at the ray’s position $\boldsymbol{\theta}_k$.

Two properties make this the physically correct surface, and distinguish it from a naïve single-plane generalisation.

Empty planes do nothing. Between deflections a ray drifts in a straight comoving line, so planes containing no lens are skipped entirely. Inserting or moving an empty plane therefore leaves $\varphi$ unchanged. A formula written in angular rather than comoving coordinates fails this test, because the $(1+z)$ factors in the angular diameter distances do not cancel.

Stationary points are images. With the source node pinned, the gradient of the arrival-time surface is

\[\nabla_{\boldsymbol{\theta}}\,\varphi = \boldsymbol{\beta}(\boldsymbol{\theta}) - \boldsymbol{\beta}_s ,\]

which vanishes exactly where the traced source position $\boldsymbol{\beta}(\boldsymbol{\theta})$ equals the fixed source position, the image positions. The relative time delay between two images is proportional to their difference in $\varphi$.

By default $\boldsymbol{\beta}_s = 0$ (source at the coordinate origin). When the Use last selected source checkbox in the Fermat Potential settings section (shown only in this mode) is enabled, the position and source-plane redshift of the most recently selected source object are used instead, so the arrival-time surface and image markers reflect the actual source being lensed.

Fermat arrival-time contour map with image-position markers. Fermat arrival-time contour map with image-position markers.
Arrival-time surface: iso-φ contours with the image markers (I, II, III) at its stationary points.
The same lens with a uniform circle source, showing the lensed images. The same lens with a uniform circle source, showing the lensed images.
The same lens with a uniform circle source: each lensed image lands exactly on a stationary point at left.
Images form at stationary points of the arrival-time surface. Left: the surface and its markers. Right: the actual lensed light of a uniform circle source at the same positions.

Image type classification

The nature of each stationary point is determined by the Jacobian $A$ at that location:

TypeCriterionCharacter
I (minimum)$\det A > 0$ and $\kappa < 1$The arrival time is a local minimum; the image has positive parity.
II (saddle)$\det A < 0$The arrival time is a saddle point; the image has negative parity.
III (maximum)$\det A > 0$ and $\kappa > 1$The arrival time is a local maximum; the image has positive parity. The central de-magnified image of an SIE belongs here.

By Morse theory, for a source inside all caustics the image count follows the sequence I, II, I, II, III (for a standard galaxy lens), giving a total of an odd number. The difference (number of minima + maxima) minus (number of saddles) equals $+1$ for a simply connected lens.

Display

The map shows iso-$\varphi$ contour lines computed analytically per pixel in the fragment shader. The default contour spacing is $0.002\,\text{fov}^2$ arcsec², adjustable with the Spacing control in the Fermat Potential section of the View tab (a multiplier of this default, available whenever the Fermat map is shown). Because the spacing scales with the field of view, the contour density stays similar as you zoom. Contours fade toward the edge of the field. The contour passing through each Type II (saddle) image is drawn thicker and brighter because it separates distinct image regions on the arrival-time surface, and this highlight tracks the chosen spacing. Stationary point positions are overlaid as markers (circle for Type I, diamond for Type II, triangle for Type III) with a type legend in the lower right.

Lensing potentials by model

The potential $\psi_k$ is computed analytically where a closed form exists:

Model$\psi$
Point mass$b^2 \ln r$
SIE / NIE$\displaystyle\frac{bq}{\sqrt{1-q^2}}\left[x_r\arctan\frac{\sqrt{1-q^2}\,x_r}{r_e+s} + y_r\operatorname{arctanh}\frac{\sqrt{1-q^2}\,y_r}{r_e+q^2 s}\right]$
External shear$\tfrac{\gamma}{2}\left[(\theta_x^2-\theta_y^2)\cos 2\varphi + 2\theta_x\theta_y\sin 2\varphi\right]$
External convergence$\tfrac{\kappa}{2}\lvert\boldsymbol{\theta}\rvert^2$
Constant deflection$\alpha(\theta_x\cos\varphi + \theta_y\sin\varphi)$
EPL$\tfrac{1}{2-t}\,(\mathbf{u}\cdot\hat{\boldsymbol{\alpha}}_\text{EPL})$, with $t=\gamma’-1$ (see §5, EPL)

The EPL potential is the exact Tessore & Metcalf (2015) form $\psi = \tfrac{1}{2-t}(\mathbf{u}\cdot\hat{\boldsymbol{\alpha}})$, a true gradient field, so the Fermat surface and image classification derived from it are self-consistent. It is singular only at $\gamma’=3$ (where the profile’s potential is logarithmic), which is guarded numerically.

Gauge note

The zero level of $\varphi$ has no absolute physical meaning; it depends on the normalisation convention. For a singular isothermal sphere with Einstein radius $b$ and source at the origin, $\varphi(\boldsymbol{\theta};0) = 0$ at $r = 0$ and $r = 2b$, not at the Einstein ring ($r = b$). What is physically meaningful is the difference in $\varphi$ between two images, which is proportional to the relative time delay between those images.

Time delays (days)

The Time delays toggle in the View tab labels each point-source image with its arrival time in days, relative to the first-arriving image (the global minimum of the arrival-time surface). The delay between two images is their difference in arrival time:

\[\Delta t_{ij} = \frac{K}{c}\,\big(\varphi_i - \varphi_j\big),\qquad K = \frac{\chi_L\,\chi_S}{\chi_S - \chi_L}\]

where $\varphi$ is the reduced Fermat potential from the box above (arcsec², converted to radians² in the code) and $K$ is its normalisation ($\chi_L$ is the first lens plane). For a single lens plane $K$ reduces to the time-delay distance $D_{\Delta t} = (1+z_L)\,D_L D_S / D_{LS}$, and the expression becomes the textbook single-plane result $\Delta t = (D_{\Delta t}/c)\,\Delta\varphi$.

The same formula holds for any number of lens planes, because the normalisation cancels: multiplying $\varphi$ back by $K$ recovers the raw comoving arrival time, so the delay depends only on the physical surface, not on the display scaling. Working in comoving coordinates is what keeps this simple, each $(1+z)$ factor is absorbed into the distances $\chi = (1+z)D$, since an excess comoving path length converts to observed time as length$/c$ (the proper-length contraction and cosmological dilation cancel).

Because $K \propto 1/H_0$, every delay scales inversely with the Hubble constant, while $\Omega_m$ shifts it through the distance ratios, and this sensitivity is exactly what time-delay cosmography exploits to measure $H_0$. The toggle needs at least one lens plane in front of the source and a point source with two or more images.

5. Lens deflection models

All models take the ray–lens separation $\mathbf{u} = \boldsymbol{\theta}_k - (c_x, c_y)$ (arcsec) and return a deflection angle $\hat{\boldsymbol{\alpha}}$ (arcsec).

Point mass

\[\hat{\boldsymbol{\alpha}}(\mathbf{u}) = \frac{b^2}{|\mathbf{u}|^2}\,\mathbf{u}\]

The deflection is radial with magnitude $b^2/\lvert\mathbf{u}\rvert$. The parameter $b$ (labelled Strength in the controls, arcsec) equals $\sqrt{4GM/c^2 D_L}$, so $b \propto \sqrt{M}$ at fixed redshift. The Einstein ring forms at $\lvert\boldsymbol{\theta}\rvert = b\sqrt{D_{LS}/D_S}$, not at $b$ itself, because the multiplane weight $D_{LS}/D_S$ is applied separately ($D_{LS}$: lens-to-source angular diameter distance; $D_S$: observer-to-source).

SIE (Singular Isothermal Ellipsoid)

A standard model for galaxy-scale lenses (Kormann et al. 1994). The projected surface density falls as $1/r_e$ (defined below).

SymbolMeaning
$b$Deflection scale (arcsec) $= 4\pi\sigma_v^2/c^2$; independent of distances
$q$Axis ratio $0 \lt q \leq 1$ ($q=1$: circular)
$\varphi$Position angle of major axis (radians, from the $x$-axis)

Step 1: rotate to principal axes using $\varphi$:

\[x_r = \cos\varphi\, u_x + \sin\varphi\, u_y, \qquad y_r = -\sin\varphi\, u_x + \cos\varphi\, u_y\]

Step 2: elliptical radius with softening $s = 0.001’’$ to regularise the origin:

\[r_e = \sqrt{q^2(x_r^2 + s^2) + y_r^2}\]

Step 3: deflection in the principal frame, with $A = bq\,/\,\sqrt{1-q^2}$:

\[\alpha_{x_r} = A\arctan\left(\frac{\sqrt{1-q^2}\cdot x_r}{r_e + s}\right), \qquad \alpha_{y_r} = A\operatorname{arctanh}\left(\frac{\sqrt{1-q^2}\cdot y_r}{r_e + q^2 s}\right)\]

The arctanh function is absent in GLSL ES, so the shader uses $\operatorname{arctanh}(x) = \tfrac{1}{2}\ln\left(\dfrac{1+x}{1-x}\right)$.

Step 4: rotate back to the sky frame:

\[\alpha_x = \cos\varphi\,\alpha_{x_r} - \sin\varphi\,\alpha_{y_r}, \qquad \alpha_y = \sin\varphi\,\alpha_{x_r} + \cos\varphi\,\alpha_{y_r}\]

In the circular limit $q\to 1$, both arguments vanish and L’Hôpital’s rule gives $\lvert\hat{\boldsymbol{\alpha}}\rvert\to b$: the constant-magnitude deflection of the singular isothermal sphere.

NIE (Nonsingular Isothermal Ellipsoid)

The NIE is an SIE with a finite core radius $r_c > 0$, replacing the central density cusp with a finite core. The deflection formula is identical to the SIE with the softening radius $s$ set to the user-specified core radius instead of the numerical floor:

\[r_e = \sqrt{q^2(x_r^2 + r_c^2) + y_r^2}, \qquad s = r_c\]

All four SIE steps apply unchanged. The NIE has no critical curve at the origin and produces a finite central surface density $\Sigma_0 \propto b/r_c$, making it more physical for lenses with observed cores (e.g. galaxy clusters with brightest-cluster galaxies).

SymbolMeaning
$b$Deflection scale (arcsec), same role as in SIE
$q$Axis ratio $0 \lt q \leq 1$
$\varphi$Position angle of major axis (radians)
$r_c$Core radius (arcsec); $r_c \to 0$ recovers the SIE

EPL (Elliptical Power Law)

A generalisation of the SIE in which the density slope is a free parameter, using the exact elliptical-power-law deflection of Tessore & Metcalf (2015). The projected surface density follows $\kappa(r_e) \propto r_e^{1-\gamma’}$, where $r_e$ is the elliptical radius and $\gamma’$ is the radial mass-density slope (written with a prime to distinguish it from the external-shear strength $\gamma$); $\gamma’ = 2$ recovers the SIE exactly.

Unlike a naive “scaled SIE” (SIE deflection multiplied by a radial power), the Tessore form is a true gradient field for every axis ratio and slope, so its convergence and shear maps are self-consistent and it admits a closed-form potential (used by the Fermat surface). In the coordinate frame aligned with the major axis, writing $t = \gamma’ - 1$ and the complex position $z = x_r + i\,y_r$, the deflection is

\[\alpha_x + i\,\alpha_y = \frac{2b'}{1+q}\left(\frac{b'}{R}\right)^{t-1}\Omega(\phi), \qquad R = \sqrt{q^2 x_r^2 + y_r^2}, \quad \phi = \arg(q\,x_r + i\,y_r)\]

where $b’ = b\,q$ (chosen so the deflection matches Caustica’s SIE scale $b$ at $\gamma’=2$) and the angular factor $\Omega(\phi)$ is summed from the Tessore recurrence

\[\Omega_0 = e^{i\phi},\qquad \Omega_n = \Omega_{n-1}\,\frac{2n-(2-t)}{2n+(2-t)}\left(-\frac{1-q}{1+q}\,e^{2i\phi}\right),\qquad \Omega=\textstyle\sum_n \Omega_n.\]

The series is truncated when a term falls below machine precision (up to 200 terms). The result is rotated back to the sky frame by the position angle. The closed-form potential is $\psi = \tfrac{1}{2-t}(\mathbf{u}\cdot\hat{\boldsymbol{\alpha}})$ (Euler’s theorem, since $\psi$ is homogeneous of degree $2-t$), which reduces to the SIE potential $\mathbf{u}\cdot\hat{\boldsymbol{\alpha}}$ at $\gamma’=2$.

SymbolMeaning
$b$Deflection scale (arcsec), same role and normalisation as in the SIE
$q$Axis ratio $0 \lt q \leq 1$ (clamped to $\geq 0.05$ so the series converges)
$\varphi$Position angle of the major axis (radians)
$\gamma’$Radial mass-density slope ($\rho \propto r^{-\gamma’}$): $\gamma’ = 2$ isothermal, $\gamma’ \lt 2$ shallower central density, $\gamma’ \gt 2$ steeper. Observed galaxies typically have $\gamma’ \approx 1.9$–$2.1$.

The implementation was ported from the lenstronomy epl_numba module and validated against Caustica’s independent Kormann SIE at $\gamma’=2$ (agreement to the softening scale $\sim 10^{-3}$″), for vanishing curl of the deflection field ($\nabla\times\hat{\boldsymbol{\alpha}} \sim 10^{-8}$, confirming it is conservative), and for $\nabla\psi = \hat{\boldsymbol{\alpha}}$.

External shear

Models the tidal field from mass not explicitly included as a lens plane (e.g. a galaxy cluster along the line of sight, or neighbouring structures). The deflection is linear in the observed angle $\boldsymbol{\theta}$, always evaluated relative to the coordinate origin:

\[\hat{\alpha}_x = \gamma_\text{ext}(\theta_x \cos 2\varphi + \theta_y \sin 2\varphi)\] \[\hat{\alpha}_y = \gamma_\text{ext}(\theta_x \sin 2\varphi - \theta_y \cos 2\varphi)\]

This follows from the lensing potential $\psi = \tfrac{\gamma_\text{ext}}{2}\left[(\theta_x^2 - \theta_y^2)\cos 2\varphi + 2\theta_x \theta_y \sin 2\varphi\right]$.

SymbolMeaning
$\gamma_\text{ext}$Shear strength (dimensionless). Typical values 0.01–0.2 for galaxy-scale lenses.
$\varphi$Shear position angle (radians), aligned with the direction of the tidal field.

The shear object’s position in the plane card has no effect on the lensing computation; the deflection is always computed relative to the coordinate origin. The marker and direction arrow can be repositioned freely for visual organisation.

Note. The effective shear visible in the lensing-quantities map is $\gamma_\text{eff} = \gamma_\text{ext} \cdot D_{ls}/D_s$, not $\gamma_\text{ext}$ itself. See §4 for details.

Constant deflection

Models the monopole contribution from a massive perturber far outside the field of view. All rays are deflected by the same constant angle regardless of their image-plane position:

\[\hat{\alpha}_x = \alpha\cos\varphi, \qquad \hat{\alpha}_y = \alpha\sin\varphi\]

This shifts caustics bodily without distorting them. It is the dominant effect of a distant perturber; at large separations shear (the quadrupole term) becomes the next-order correction.

SymbolMeaning
$\alpha$Deflection amplitude (arcsec).
$\varphi$Deflection direction (radians).

The object’s position has no effect on the lensing.

External convergence

Models a uniform mass sheet along the line of sight (e.g. an overdense filament or underdense void). The deflection is purely radial, always evaluated relative to the coordinate origin:

\[\hat{\alpha}_x = \kappa\,\theta_x, \qquad \hat{\alpha}_y = \kappa\,\theta_y\]

This follows from the potential $\psi = \tfrac{\kappa}{2}\lvert\boldsymbol{\theta}\rvert^2$ and is isotropic, with no preferred direction.

SymbolMeaning
$\kappa$Convergence (dimensionless). Positive for overdense structures, negative for underdense voids.

The object’s position has no effect on the lensing. External convergence is related to the mass sheet degeneracy: a uniform sheet cannot be distinguished from a rescaling of all lens masses and source distances using image positions alone.

6. Source brightness models

Once a ray arrives at a plane at position $\boldsymbol{\beta}$, the brightness of each source object at that plane is evaluated. The elliptically-weighted separation from the source centre is:

\[\mathbf{d} = \boldsymbol{\beta} - (c_x, c_y), \qquad \begin{pmatrix}x_r \\ y_r\end{pmatrix} = R(-\varphi)\,\mathbf{d}, \qquad r_\text{ell}^2 = x_r^2 + (y_r/q)^2\]

where $R(-\varphi)$ rotates by $-\varphi$ to align with the source axes. Note: $r_\text{ell}$ differs from the lens elliptical radius $r_e$ by a factor of $q$, reflecting different conventions in their respective fields. For sources, $\sigma$ is the semi-major axis of the brightness isophote (the standard in galactic photometry). For lenses, the Kormann et al. (1994) convention keeps the deflection scale $b$ independent of $q$.

SymbolMeaning
$(c_x, c_y)$Source centre (arcsec)
$\varphi$Position angle of major axis (radians)
$q$Axis ratio minor/major, $0 \lt q \leq 1$
$\sigma$Scale radius (arcsec)
$A$Amplitude (peak surface brightness)
Point source lensed by an SIE into multiple images. Point source lensed by an SIE into multiple images.
Point source
Gaussian source lensed by an SIE. Gaussian source lensed by an SIE.
Gaussian
A pasted image lensed by an SIE. A pasted image lensed by an SIE.
Pasted image
The same SIE lens acting on three source types: an idealised point source, a Gaussian blob, and a pasted image.

Gaussian

\[I = A\exp\left(-\frac{r_\text{ell}^2}{2\sigma^2}\right)\]

The Show Shape ellipse is drawn at $r_\text{ell} = 2\sigma$.

Exponential

\[I = A\exp\left(-\frac{r_\text{ell}}{\sigma}\right)\]

More extended than Gaussian; $\sigma$ is the exponential scale length. This is a Sérsic profile with $n=1$.

Uniform circle

\[I = \begin{cases} A & r_\text{ell} \leq \sigma \\ 0 & \text{otherwise} \end{cases}\]

A filled disc of constant brightness with radius $\sigma$. The axis ratio $q$ is fixed at 1 (always circular), so $r_\text{ell}$ reduces to the ordinary Euclidean radius.

Point source

A mathematically point-like source for simulating quasars or other compact objects. The source position $(c_x, c_y)$ is specified in the source plane; the simulator finds all image positions $\lbrace\theta_i\rbrace$ by solving the lens equation $\beta(\theta) = (c_x, c_y)$ numerically, then draws a circle of fixed angular radius $\sigma$ at each $\theta_i$ in the image plane.

Image positions are found via a two-stage algorithm: a coarse grid search using sign-change topology to locate starting guesses, followed by Newton–Raphson refinement with backtracking line search until $\lvert F(\theta)\rvert^2 \lt 10^{-14}$ arcsec². Each converged solution is deduplicated. Because the circles are drawn in the image plane with fixed size, they are not stretched or sheared by lensing; this is appropriate for modelling the PSF-limited appearance of a quasar image.

Heads up. Einstein rings and arc-shaped images do not appear in this mode. Use a Gaussian or uniform circle source for extended-emission lensing. Highly demagnified images (such as the central odd image of an SIE lens) may be missed by the grid search.

The grid density used for image finding is set in the Settings tab (the gear icon) as Point source, the number of sample points across the field of view (Coarse 150, Medium 300, Fine 600, or Very fine 1200). Denser grids find images more reliably near caustics but are slower; the default is Medium (300). Because the count is fixed rather than an absolute angular spacing, the cost stays bounded as the field of view grows to cluster scale.

Pasted image

A user-pasted image is uploaded to the GPU as a WebGL texture. At each pixel, $\boldsymbol{\beta}$ is converted to UV coordinates centred on $(c_x, c_y)$ spanning $\pm\tfrac{\text{fov}}{2}$ arcsec, and the texture is sampled with bilinear interpolation.

Compositing and brightness stretch

Contributions from all source objects across all planes are summed per pixel to give a linear intensity $I \in [0,\infty)$. Hidden objects contribute nothing to the sum, nor to deflection or critical curve computation. The sum is clamped to $[0,1]$ and passed through a nonlinear stretch before display.

The dynamic range of astrophysical sources (bright ring core to faint extended arcs) far exceeds what a monitor can show linearly, so the stretch is essential. In surface-brightness mode the Color Map section of the View tab is titled Brightness stretch and exposes the same machinery used for the quantity maps (§4), applied independently to each RGB channel:

With the default Min/Max of $0$ and $1$ the Square root, Power law, and Asinh curves all satisfy $f(0)=0$ and $f(1)=1$, reproducing the classic tone-mapping curves exactly. The colour-palette dropdown is hidden in this mode, since the lensed image carries its own colour.

7. Critical curves and caustics

Critical curves are contours in the image plane where $\det(\partial\boldsymbol{\beta}/\partial\boldsymbol{\theta}) = 0$. Sources near a critical curve are highly magnified and stretched into arcs. Their pre-images in the source plane are the caustics; crossing a caustic changes the image count by two.

The computation proceeds in four steps:

  1. Sample a ray grid. Trace $N \times N$ rays (the Critical curves resolution in the Settings tab, default $N = 512$) to the chosen source plane using the multiplane recursion, recording $\boldsymbol{\beta}$ at each image-plane point.

  2. Compute the Jacobian. At each interior grid point, approximate the $2\times2$ Jacobian $\partial\boldsymbol{\beta}/\partial\boldsymbol{\theta}$ via central finite differences and compute its determinant.

  3. Find zero-crossings. Apply marching squares: for each $2\times2$ cell, linearly interpolate zero-crossings on edges where the determinant changes sign. Each cell contributes one short segment; adjacent cells chain into smooth curves.

  4. Map to caustics. Each critical-curve point is traced to the source plane by interpolating from the already-computed $\boldsymbol{\beta}$ grid.

Critical curves and caustics of a compound lens. Critical curves and caustics of a compound lens.
Critical curves (image plane) and their caustics for a compound lens, toggled with the C key. The extra mass components merge and distort the curves well beyond the simple SIE case. A source crossing a caustic changes the image count by two.

Note. Fine features such as cusps are only resolved at higher resolutions.

8. Recording, capture, and animation

The Export tab in the right rail turns the live view into a still image, a video, or a smooth animation. Every capture reflects exactly what is on screen: the active view (lensed image or any quantity map), the overlay (position markers, critical curves and caustics, ruler measurements), and the color bar. UI chrome (the rail, the quantity dropdown, the ruler and zoom buttons, the performance badge) is excluded, and in the lensed-image view the same light-mode inversion used on screen is baked into the output so the file matches what you see.

Still image

Save PNG writes a single frame of the current view to caustica.png.

Video and GIF formats

Two output formats are offered, selected by the Format control:

FormatEncoderNotes
WebMBrowser-native MediaRecorderFast and lightweight. During a programmatic animation, critical curves are omitted so the real-time encoder keeps accurate frame timing.
GIFVendored gif.js, loaded on demandAuto-looping and universally shareable, but slower to encode and limited to 256 colors. Programmatic animations include critical curves at full resolution.

The Frame rate control offers 5, 10, 15, 24, or 30 fps.

Free recording

Press Record (or the R key) to begin, then interact with the scene however you like: drag objects, adjust parameters, switch quantity maps, toggle overlays. Frames are grabbed at the chosen frame rate as you work. Press Stop (or R again) to finish and download the file (caustica.webm or caustica.gif). Recording stops automatically after 30 seconds as a safeguard.

Programmatic animation

For smooth, reproducible motion without hand-dragging, use the Programmatic section:

  1. Select an object, place it at its starting point, and click Set beside Initial; move it to its ending point and click Set beside Final.
  2. Click Add to program. Repeat for as many objects as you like.
  3. Set a Duration (0.5 to 60 s) and click Record program.

Every listed object is interpolated linearly and simultaneously from its initial to its final position over the duration, rendered frame by frame at the chosen frame rate (output caustica-prog.webm or caustica-prog.gif). Because the positions are computed rather than dragged, the animation is deterministic and free of the jitter of a hand-held drag.

Programmatic animation of two point-mass lenses moving apart, their critical curves and caustics evolving. Programmatic animation of two point-mass lenses moving apart, their critical curves and caustics evolving.
A programmatic GIF recording of two point-mass lenses, one moving left and one moving right, passing in front of a central background source. Each lens carries a circular critical curve (pink) and cuspy caustic (green).

Data export (CSV)

The Data section at the bottom of the Export tab writes the most recently computed overlays to CSV, with all positions in arcseconds. Curves exports the critical-curve and caustic segments (one row per segment, labelled critical or caustic, at the source redshift they were computed for); Image positions exports the numerically solved point-source image positions. Each button enables once the corresponding overlay has been computed at least once (show critical curves, or add a point source).

9. Preset Configurations

The Presets… dropdown in the top bar loads ready-made scenes:

10. Code structure

Caustica is written in vanilla JavaScript with no framework. The source lives in /assets/caustica/.

lens.js

Pure physics; no DOM access or rendering.

renderer.js

WebGL2 GPU renderer.

main.js

Application shell (~5300 lines).

style.css

Single stylesheet using CSS custom properties for theming (--accent, --lens-color, --src-color, --hybrid-color, and others) with html[data-theme="dark"] overrides. The layout is a CSS grid: the stage (which letterboxes the square image using container-query units) and the slim timeline strip on the left, the tabbed rail on the right. On desktop the plane viewer is pinned to the bottom of the rail as a direct child (kept below whichever tab is open), and its top hairline runs edge to edge across the full rail width while its own horizontal padding insets the viewer content to match the tab panels. Narrow screens (≤ 640px) collapse to a single scrolling column — image, then the rail, with a mobile-only Object tab hosting the object controls and the plane viewer moving into the Scene tab above the redshift timeline. There the viewer’s tools become a single column of larger tap targets (L / S / H at the top, a trash button floated to the bottom), the ‹ › arrows hug the canvas, and the tool column and the Redshift / Plane column stretch to the canvas height and sit an even gap from it, so the four control clusters frame the canvas at its corners. Short landscape viewports (height ≤ 480px, e.g. a phone held sideways) show a full-screen prompt asking for a taller window instead of the app.

gif.js + gif.worker.js

A vendored local copy of the gif.js library. Loaded lazily (only when GIF recording is requested) via a dynamic <script> tag, avoiding cross-origin Web Worker restrictions that would arise from a CDN-hosted copy.

References